
Streaming vs Blocking Conversational UIs with the Vercel AI SDK
Should you use a streaming or blocking interface? What are the tradeoffs?
Conversational user interfaces like chatbots have exploded in popularity recently thanks to large language models like GPT-3. However, these powerful models can be slow to generate responses, especially long ones. This poses challenges when building real-time conversational UIs.
Subscribe or follow me on Twitter for more content like this!
Should you use a streaming or blocking interface? What are the tradeoffs? In this post, we'll explore these questions and how to implement both types of UIs using the Vercel AI SDK.
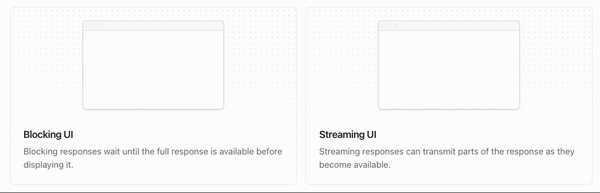
The Problem with Blocking Interfaces
A blocking conversational UI waits for the full AI-generated response before displaying anything to the user. This can mean staring at loading indicators for many seconds before seeing the result.
Here's an example blocking interface prompting GPT-3 for the first 200 characters of Harry Potter:

The user has to wait over 10 seconds before seeing any output. This poor experience is unacceptable for conversational products.
Streaming to the Rescue
With a streaming interface, parts of the AI response are sent to the user as soon as they are generated. This provides a much more natural conversational feel.
Let's look at that same Harry Potter example with a streaming interface:

Now the output starts appearing after just a second or two, with more being appended in real-time as it's generated.
Streaming conversational interfaces lead to much better user experiences. The Vercel AI SDK is designed to make building them easy.
Guide: Implementing Streaming-based UI with Vercel AI SDK
Let's look at a step-by-step guide to implementing streaming in a test Next.js app. We'll use a chatbot in this example
Step 1: Set Up Your Next.js App
Start by creating a new Next.js application and installing the necessary dependencies. In your project directory, use the following commands:
npx create-next-app my-ai-app
cd my-ai-app
npm install ai openai
Step 2: Add Your OpenAI API Key
OpenAI's API Key is obviously pretty crucial for accessing the language model! Create a .env file in your project root and add your OpenAI API Key:
OPENAI_API_KEY=your_api_key_here
Step 3: Create a Route Handler
Create a Next.js Route Handler that will utilize the Edge Runtime to generate a chat completion via OpenAI. This completion will be streamed back to your Next.js application. Create a file named route.ts in the app/api/chat directory:
import OpenAI from 'openai';
import { OpenAIStream, StreamingTextResponse } from 'ai';

const openai = new OpenAI({
  apiKey: process.env.OPENAI_API_KEY,
});

export const runtime = 'edge';

export async function POST(req: Request) {
  const { messages } = await req.json();

  const response = await openai.chat.completions.create({
    model: 'gpt-3.5-turbo',
    stream: true,
    messages,
  });

  const stream = OpenAIStream(response);

  return new StreamingTextResponse(stream);
}
Step 4: Wire Up the UI
Create a UI component that interacts with the streaming-based completion. Use the useChat hook provided by the ai/react package to simplify UI integration. This component will allow users to send messages and view the chat history in real-time:
import { useChat } from 'ai/react';

export default function Chat() {
  const { messages, input, handleInputChange, handleSubmit } = useChat();

  return (
    <main className="mx-auto w-full h-screen max-w-lg p-24 flex flex-col">
      <section className="mb-auto m">
        {messages.map(m => (
          <div className="mb-4" key={m.id}>
            {m.role === 'user' ? 'User: ' : 'AI: '}
            {m.content}
          </div>
        ))}
      </section>
      <form className="flex space-x-4" onSubmit={handleSubmit}>
        <input
          className="rounded-md p-2 text-black"
          value={input}
          onChange={handleInputChange}
          placeholder="Say something..."
        />
        <button
          className="border-solid border-2 border-white p-2 rounded-md"
          type="submit"
        >
          Send
        </button>
      </form>
    </main>
  );
}
By following these steps, you can seamlessly implement a streaming-based UI for your example chatbot using the Vercel AI SDK. This approach enhances user experiences by providing quicker and more natural responses in real time, resulting in improved user satisfaction (we hope!).
When to Avoid Streaming
While streaming UIs improve experiences with large, slow models, they aren't always necessary. If you can satisfy your use case with a smaller, faster model, a blocking interface may suffice.
Streaming also introduces some extra complexity on the front end to smoothly handle the incremental data. So if streaming isn't needed to achieve quick response times, it's often best avoided.
Putting It All Together
In summary:
- Blocking conversational UIs suffer from poor loading experiences as users wait for responses.
- Streaming UIs improve this by sending partial responses as they are generated.
- The Vercel AI SDK makes building streaming interfaces easy.
- But streaming may be overkill depending on your model and use case.
I hope this overview helps you decide how to architect the best conversational interface! The Vercel AI SDK provides the flexibility to implement both streaming and blocking designs.
Subscribe or follow me on Twitter for more content like this!


Comments ()